
Anyone can install a remedial cavity wall tie and they are available to buy on the internet for a DIY approach. Why is it, that structural engineers, architects, local authorities’ and mortgage lenders ask a specialist to do this?
There are a few good reasons…..
Cavity wall ties are crucial to the safety and stability of all cavity walls. They are inserted by the bricklayer as he constructs the masonry and this has been the practice for almost a century of cavity wall tie construction in the UK.
Building wall ties into a wall as it’s built is straightforward and there is little to get wrong (though mistakes do happen in new built houses too). However, installing new wall ties in existing construction is another matter.
Before considering installing new remedial cavity wall ties, these are some factors that need to be considered:
- What spacing’s apart should the remedial ties be fixed?
- How long should the wall ties be, to accommodate the thickness of the wall and the width of the cavity?
- How exposed is the building and will the above numbers of wall ties need to be adjusted?
- What is the construction material of the cavity wall in the inner and outer leaf (block, stone, brick or timber)?
- Where are the sections of wall where cavity wall ties should not be installed (there are always some)?
- Is the cavity clear of debris or cavity wall insulation, which may be contaminated by the wall tie work?
- How accessible is the wall for safe wall tie installation, (you are responsible for your own safety and the safety of others working for you)?
- What diameter of pilot hole do the wall ties need and how deep?
- Are there finishes like render which the wall ties will need to be fixed through effectively?
- How can the remedial wall ties be tested, so you know they are working?
- Can the look of the building be preserved, avoiding a ‘polka-dot’ effect?
- Will the wall ties last the life of the building?
- Taking the above into account and having chosen the cavity wall tie suitable for the inner and outer leaf fix, how will the effectiveness be monitored on site?
- Who will install the wall ties and what training has he/she had?
- What equipment is needed to drill the pilot hole, install the ties and test them properly?
- What is the recording and reporting procedure for on-site wall tie testing?
- What is the alternative if the remedial ties fail random testing for unforeseen reasons and what will this cost?
- Finally; what guarantee will be issued, covering the materials and the workmanship and is it an insured guarantee?
There are a few more than these eighteen questions but these are the crucial ones to ask before a wall tie replacement job starts.
None of this is rocket science so here are the brief answers to the above….
The wall tie spacing’s depend on a combination of factors, including the cavity width and the width of each leaf. They vary from the usual 900mm by 450mm staggered pattern to as close as 450×450 in some situations. There are parts of the wall which need special attention, such as the untied reveals around windows and verge positions. The wall tie ‘density’ takes into account the wind loadings too (these can vary over the country and with height). It may also take into account the efficiency/effectiveness of the tested wall tie installation. Low performance will mean that more ties are needed; an increase in wall tie density. High performance can help reduce the wall tie density, provided a structural engineer has been involved in the calculation and, thorough on-site testing has ‘proof tested’ the installation.
Remember that any performance figures given by the manufacturer are generic and may well not apply on your site – only on-site wall tie testing can indicate the real performance because the manufacturer has not seen your wall and he did not build it (read the terms and conditions and you will find this confirmed on all cavity wall tie manufacture’s data sheets)
The embedment depth of ties depends on several factors also. Generally a 50mm penetration into each leaf is suggested as a minimum, but this assumes a standard brick cavity wall and does not take into account internal face spalling (caused by the percussion drilling in the external leaf ‘blowing’ a chip of brick from the back of the outer skin – effectively reducing the wall thickness at that point). This penetration is a guide only and often deeper tie penetration is needed. In soft material like old clinker block, the pilot hole depth or diameter may need to be increased (diameter increases are applicable particularly to resin/grouted anchors to reduce ‘bearing’ stresses). Timber frame housing is a special case also, and very thorough, random testing is needed to monitor the depth of fixing needed, to obtain a good fix in the timber studs. Timber is a natural material and varies in strength even on the same building, depending on the sapwood content and accuracy of the initial build.
There are charts which show the exposure of buildings to prevailing winds and of course with high-rise buildings loadings will be higher. They are higher too in domestic situations, where for instance two house are constructed with a gap between the gables, (common on many housing estates) resulting in a wind funnelling effect, which puts great strain on the wall ties as the wind speed reduces air pressure and ‘suck’ the gables together. This needs an increase in density to double the number of wall ties which would otherwise be needed.
Wall ties need to be flexible to allow the inner and outer skins of a wall to move differentially. For this reason corners of houses need to be avoided, otherwise the new ties may cause stress fractures, as they resist this movement. Any hidden services need to be avoided too. There shouldn’t be any cables or pipes in the cavity, but they are more common than you’d think and drilling through a cable to install a cavity wall tie could be fatal.
Cleanliness of the existing cavity is also something to consider before installing cavity wall ties. If the cavity is full of debris or cavity wall insulation the specification will need to reflect this. Cavity wall insulation in particular is ignored by many wall ties installers and DIY users. The issue is one of contamination of the insulation. Insulation is usually old foam or modern fibre or bead type. By its nature it is a friable, lightweight product, designed to reduce heat loss and allow water vapour to pass across the cavity freely.
Installation of remedial wall ties will always result in some material being ejected into the cavity. This is a combination of powdered brick/stone dust (drill spoil), from the outer and inner leaf (a 12mm hole 100mm deep in the outer and 60mm deep in the inner produces about 19cm3 of drill spoil). However, the drill spoil is aerated of course, so it’s bulked up by the air and the pile of debris is much bigger than that. Over half of this is ejected to the outside of the wall (into your face as you drill), but the rear part (including any spalled rear face, which may be quite big see above), and all of the spoil from the inner leaf is spewed into the cavity. This is not an issue if the cavity is empty – the dust cannot bridge a damp proof course or cause bridging. It’s a different story in the insulated cavity though.
In the insulated cavity the drill spoil cannot fall away and stays put. The result is rather like a dirty snowball (or a Comet as that cheeky chappy Brian Cox would call it). There will be one of these at each wall tie position and each wall tie isolation position, if you are isolating the rusty cavity wall ties too. The effects on the insulation are serious.
The insulation is compressed by the debris, which is denser than it is. Also the debris transfers heat and moisture very efficiently. Thus a couple of hundred or so wall ties will massively reduce the efficiency of the insulation. The heat loss is not that significant financially, but from the condensation perspective it can lead to problems. Slight variations in the insulation cause cold spots to occur (surveyors call this, cold bridging), which can, if humidity is high, cause mould growth and damp patches on the inside of the walls. It gets worse…. leaving excessive debris in position also allows water to travel across the cavity (cavity bridging), which can worsen the situation by wetting the insulation or in severe cases causing penetrating damp internally. All remedial cavity wall ties have a ‘drip’ feature included. The type vary but they all work by forcing rainwater to drip off the wall tie before it can reach the inner skin and cause damp. In contaminated insulation these drips merely fall onto the contaminated ‘snowball’ and worsen matters.
So where insulation is present, extra steps should be taken to minimise cavity contamination, by changing installation procedures, and remove debris, by introducing additional measures on site.
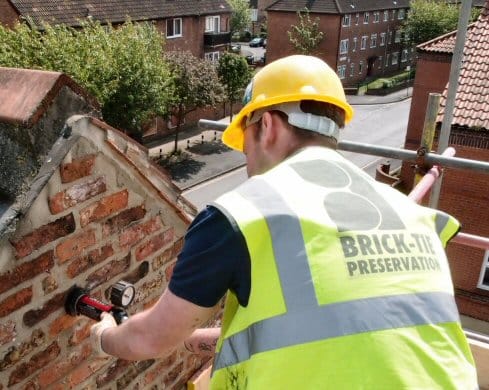
Safe access for wall tie replacement.
Installation of wall ties involves drilling with both hands, at heights all over a building. Falls from height is still the biggest killer in construction and unfortunately the most common causes are ladder accidents and DIY incidents. Testing of the wall ties also, requires both hands and notes or photographs need to be taken. For this reason a scaffold tower or fixed tubular scaffold is essential. The risk of hitting hidden services means that only double insulated equipment and 110v centre tapped to earth machines should be considered. The state of the ground; slopes; overhangs; overhead power cables and obstructions, like conservatories and such are all something a competent wall tie specialist will take into account. Presence of children, customers, visitors or other contractors working on the site is important too. The work is very noisy and can be dusty.. Neighbours should be consulted.
If the wall is rendered, pebble dashed or coated with anything, this will reflect on the method of installing the wall ties and the type of remedial tie. For starters, is the material sound? Drilling causes vibration and may shake loose or crack old render. Could there be services or pipes under the coating, a metal detector should help here. The use of a remedial cavity wall tie designed for mechanical expansion should be avoided, because without extreme care and many aborted holes, some of these will inevitably be drilled near the edge of a bed joint, where post-torsion expansion can ruin the fix, see below), leaving the wall tie useless and a waste of time and money. Mechanical expansion ties work by exerting expansive force outward, through the brick or stone; rather like a rawlbolt. If the material cannot take these stresses, the material fails and the fix is compromised. Thus most manufactures of these wall ties recommend the wall ties are fixed ‘centre of brick’ to ‘centre of brick’, which is hard when the brick is hidden behind render (not to mention the inner leaf which is always hidden).
So if render is present, non-expansive type wall ties should be selected such as; resin bonded wall ties in both skins; Helifix ResiTie, or combined resin/friction fix, such as the Helifix RetroTie (friction fix inner leaf, which can be tested independently of the outer), followed by resin fix in the outer leaf.
The material for almost all remedial wall ties is stainless steel. This means that in practice these should not corrode. However, there are some areas where further precautions are needed and higher quality 316 grade stainless steel, often referred to as ‘marine grade’ should be used. This applies to coastal areas, contaminated sand and on some prestige or historic buildings where a very long life is specified (we installed Cintec 316 grade stitching anchors in York City walls, after a 500 years life was specified). Higher grade stainless is also used in some of the helical friction fix wall ties, particularly those which fix in one action, through the outer skin and into the inner leaf. However I do not specify these wall ties due to risk of failure of the inner leaf fix, which cannot be randomly tested.
Testing? This is essential on all remedial wall tie installations. The method is usually simple tension tests, to establish that the wall ties are gripping the masonry sufficiently to fulfil the design criteria. New wall ties, installed by a bricklayer do not need to be tested; they are so simple to drop onto an open bed-joint, what could go wrong? Remedial wall tie installation is different. There are lots of things to go wrong. Despite taking time choosing a wall tie, they sometimes fail to achieve the desired fix – this applies to all the common wall ties available from specialists or via the internet. My advice is if the wall ties cannot be tested don’t use them. This is because houses vary, bricklayers vary, mortar mixes vary and the quality of the wall is always a variable. Inner leafs may be soft block work or rock hard engineering brick. All remedial wall ties have weaknesses and there is no one wall tie, which works well in all situations. Only by on site testing can anyone hope to catch the odd house where the ties have not ‘done what they said on the tin’.
A tension testing rig costs about £700 plus VAT and because every job needs testing a wall tie specialist may have several of them; so that there is one available on all contracts. In addition, they are carried in and out of vans and here and there on windy scaffolds – they get damaged and lose accuracy. For this reason they need to be calibrated at least annually and this can cost over £100 each time. Only a specialist using these weekly can justify the cost. Though they can be hired, the use of them requires a knack and some training. A large selection of special adapters to fit the wide array of remedial wall ties on the market is a must too… no good having a rig if you find that the wall ties you’re using, don’t fit it. Testing varies in intensity, from a random 5% of the ties to as many as 100%, in very sensitive situations or unique masonry details. There’s no point testing if you don’t have a pass or fail figure. This can vary from 1Kn to much more, depending on the application.
Remember why tests are done. It’s about achieving a proper job and gaining the credibility for the completed wall tie work. There must be a good system to record the gauge readings. This must be written but can also be supplemented by photographs of the gauge readings and test positions. I’ve been adding the photography method onto our existing practice for about 16 years and it’s already catching on with some other wall tie specialists now.
What if the tests throw up a problem? Well, in a way, that is good news, you now know, what you wouldn’t have known otherwise and can take steps to rectify the issue. If the tension tests are slightly below target you can look at the installation method; maybe a deeper hole? If this is not practical, how about a slight increase in wall tie density? On the other hand it may be that the chosen wall tie is proved unsuitable for the wall in question, so what alternatives are available? Can they be tested alongside and a specification change authorised? These are the decisions qualified wall tie installers and specialists need to make, so having well trained, well briefed and qualified staff will take this into account. Where a specialist contractor is involved, the support of the management; placing systems of work in place which allow, or expect these problems will make sure that the completed work is fit for purpose. It is one reason why City and Guilds designed a level 2 National Vocational Qualification for wall tie technicians; something I’m proud to say our technicians and I have.
Having completed the work a guarantee would be nice? Of course if the builder or a DIY job occurred that is not an option. Often though, these works are required with a guarantee, usually for 20 years. The guarantee should be a last resort needed in the event of a failure, so if the work has been done to the standards set out above, is it really needed?
The answer to that is yes. The reason is not really so that it can be claimed on. It’s so that the issue of wall tie corrosion can be set aside and forgotten. Houses get bought and sold, mortgages are renewed with other lenders, and loans are taken out against property for many reasons. A sound insurance backed guarantee means that these transactions can go ahead without the spectre of wall tie corrosion being thrown into the mix. Having the documentation in place, with the insurance policy and such underlines the credibility of your wall tie installation and avoids time wasting surveys and argument later.
No company last forever so real insurance backing for a guarantee is a must. Guarantee protection Insurance is available via all good specialist contractors and is a must in my view.
That’s a quick guide on what wall tie installation involves from a practical perspective. I hope you found it helpful